No Products in the Cart
By Hal Gourad, CPSI, RISC, ICS.
I often get asked the question “what playground surface should I choose?” and I always find myself going through all options, with their merits and costs, maintenance expectations and longevity, and last but not least: accessibility. I scoured the internet and trade publications to find a simple document that goes over all these options objectively and in laymen’s language for clients and sub-contractors. To my surprise, I didn’t find such document. So I am now setting out to write my own. Having been in the commercial playground business for 12 years now, I have worked extensively with all types of safety surfaces in many geographic areas. I have repaired lots of them, seen some big jobs fail for very simple oversights. Most importantly, I have come to appreciate that there is no magic bullet. Every site has its unique properties that will call for certain surfaces that others won’t. As an example, I am not a big fan of sand as a safety surface. Although it is technically an accepted form of safety surface by CPSC and ASTM ( I will explain these agencies shortly.) where I live in New England, it tends to attract bees and compact to be an unsafe solid surface in damp/cold weather. But having said that, if your playground equipment is on the beach, sand will be the best/ most economical option you might have. Even if you could afford poured in place rubber in this situation, the surrounding abrasive sand will be all over it reducing its shelf life and presenting a maintenance nightmare for the owner/operator. There however generalizations that make its surface unique from others, and that’s what this document is all about. I’d like my customer to be educated about all options so they know what they are getting into. Finally, this is a work in progress. The information presented here is based on my experience and my research. If I am missing anything, please let me know. You can email me at hal@trassig.com or call me at: 203-659-0456.
Let’s start with the basics.
Every year, on average, 220,000 kids are sent to the emergency room due to injuries in public playgrounds. 80% of those injuries are due to falls, and 70% of those falls are to the surface of the playground. So, adequately surfacing your playground is very crucial. And No.. Grass, and dirt are not considered adequate here. Even the lushest lawn does not have the right impact attenuation to cushion a fall.
The following ASTM standards govern the world of playground surfacing. The number after the dash refers to the year of the last revision of the standard. There are also specific standards to some types of surfacing such as Engineered wood fiber (ASTM F2075 – 15), Poured in place rubber (ASTM F2479 – 12) and shredded rubber (ASTM F3012-14)
ASTM F1292 – 13: Standard Specification for Impact Attenuation of Surfacing Materials Within the Use Zone of Playground Equipment
ASTM F2223-15: Standard Guide for ASTM Standards on Playground Surfacing
ASTM F1951 – 14: Standard Specification for Determination of Accessibility of Surface Systems Under and Around Playground Equipment
We can categorize all the surfacing options available now into two categories:
Loose fill surfacing: As the name entails, this is surfacing that is loose, which by default, means it has to be adequately contained. Generally, the site is either dug up, a filter fabric layout out and loose surfacing installed on top, or the grade is kept as is with some type of bordering (Either rail road ties, concrete, asphalt bordering, or plastic borders) surrounding the material. The following are the types of loose fill available to be used in playgrounds: Sand, gravel, engineered wood fiber and shredded rubber. I will talk in more details about these later on.
Unitary surfacing: This is either a seamless surfacing or blocks of surfacing installed to create a continuous surface. The following are options for unitary playground surfacing: Rubber tiles, synthetic turf, poured in place rubber, Bonded Rubber, Hybrid systems (More on these later).
ASTM 1292 lays out the parameters used to test playground surfaces. Now is a good time to introduce the terms HIC and GMAX tests. HIC stands for Head Injury Criteria. GMAX refers to the maximum G’s mechanical shock. A ball form representing the head of a child is dropped from the highest designated play surface in the playground onto the surface to generate a HIC or GMAX reading. GMAX levels have to be below 200 G and HIC levels have to be below 1000.
 A ball form about to be dropped to measure HIC and GMAX
More on each type of playground surfacing:
I will talk about all the available surfaces in this section, except sand and pea gravel. These I tend not to recommend to schools and municipalities, unless, like I said before, the playground happens to be at a beach and you can’t avoid sand or you have an ample supply of pea gravel for free. Sand and Pea gravel sometimes compacts to be very hard, especially when it accumulates dirt. They also tend to attract insects, especially bees.
Engineered wood fiber is the technical term for “playground mulch”. The keyword here is “playground”, because you do not want landscaping mulch on your playground. You will not know where your landscaping mulch comes from. Shipping pallets are ground up to create mulch (and who knows what was shipped on them), so there is no guarantee the mulch is clean or doesn’t have nails (Ouch). Landscaping mulch will have bark and resin. The strands tend to be longer and can be used as a weapon on the playground. On the other hand, EWF has to come from Virgin wood (hard or soft) and the size is typically uniform. When purchasing EWF make sure to ask for IPEMA certified materials only. That certification will ensure that the EWF passes the following criteria.
– Meets the impact attenuation test as outlined in ASTM F-1292.13
– Meets the sieve analysis test as outlined ASTM F-2075.10a
– Passes the heavy metals test outlined in ASTM F-2075.10a
– Passes the tramp metals test outlined in ASTM F-2075.10a
– Meets ADA Accessibility outlined in ASTM F1951-09b
All test results must be in writing and from a certified test lab. The supplier should be able to certify all Engineered Wood Fiber comes from the same manufacturing facility as the test results.
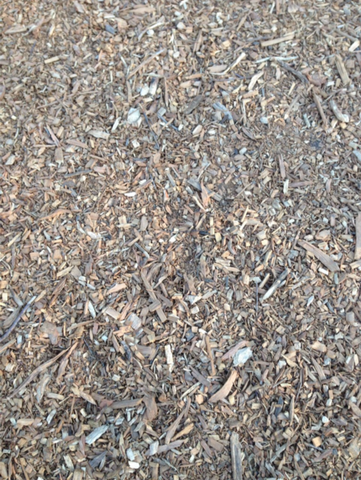
The following video shows what Engineered Wood Fiber should look like:
Choosing the site for Engineered wood fiber is key to its longevity and to reduce maintenance. Choose a site that is fairly flat but that also has a little pitch so water can drain. If the site is too slanted, the EWF will try to migrated down forcing you to rake it up all the time. If the site is flat or dug out, we recommend installing a layer of crushed stone and some type of drainage system and overlaying it with filter fabric before you install the EWF.
The cost of engineered wood fiber is going to vary greatly across the nation. Expect to pay more for EWF than landscape mulch of course. For material, only, I have seen anywhere from $25 to $55 per cubic yard plus delivery. Of course, the smaller the quantity ordered, the highest per yard cost is going to be for delivery.
Among all surfacing materials, EWF is the one that needs the most maintenance. Like all organic materials, it will decompose with time. It will also compact with use. This means that you have to replenish it over time. A good practice is to have marked borders or playground posts with a line that shows the “fill level” of EWF as a reminder to replenish it. The decomposition rate is highly affected by how well the site drains. The more the wood fibers stay wet, the faster the break down. If the area doesn’t drain well, expect frozen EWF in the winter as well.
You also have to rake the EWF constantly to make sure the impact attenuation is uniform throughout the site and also to keep compliant with ADA laws. This can be very challenging in areas with high traffic, such as entry points, slide exits and under swings. We recommend using wear mats in those areas to minimize the displacement of EWF
Rubber mulch, or shredded rubber, is an upgrade from Engineered Wood Fiber in the loose surfacing world. Unlike EWF, shredded rubber will not compact or decompose. It will not mold, attract animals or insects. And if it is well contained, it will not have to be replenished. You might have to add a few bags here and then for the stuff that is displaced through play, but generally, it is heavy enough that it will stay in place. Shredded rubber comes from used tires, and is a great solution to these ending up in our landfills. The tire is usually stripped of its steel mechanically and then checked for loose metal with powerful magnets. It is shredded into nuggets or slivers and then tinted with pigments. Please note that shredded rubber is not recommended for play areas that have kids two-year-old or younger, as they like to put it in their months, creating a choking hazard. You might want to consider another surface even if the area in question is close to another area that has toddlers, as the shredded rubber will tend to find a way to other areas through kid’s shoes, or simply kids throwing it around.
The shredded rubber you procure for your playground should at a minimum meet the following criteria:
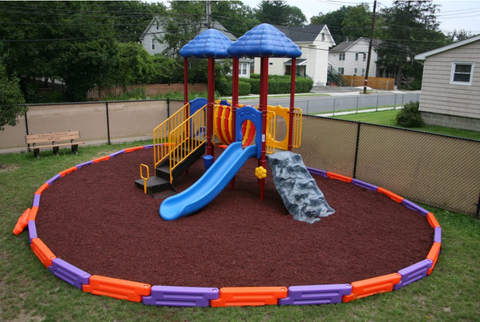
Shredded rubber comes in three forms:
Just like Engineered wood fiber, site prep is crucial to a good shredded rubber installation. Good site location and drainage will ensure you will not rake the rubber mulch all the time, and that it will drain properly and not freeze in the winter. Using good filter fabric will minimize contact with the soil and prevent weeds from growing through the rubber nuggets. The minimum thickness you want to install is 6”. This translates into around 13 pounds per square foot. You want to double check that number with your rubber mulch supplier as it can change from manufacturer to manufacturer. Just like EWF, we also recommend using wear mats in high traffic areas in a shredded rubber install.
You should expect to pay anywhere between $6 to $8 per square foot for a new installation of shredded rubber. This would be for the colored rubber, which typically costs more than the black, uncoated rubber. I don’t uncoated rubber since it stains the kids. If you want to pay just for material, expect to pay anywhere between $600 and $800 per supersack (2,000 pounds). Other costs involved in the install are: Borders and geofabric.
Just like Engineered wood fiber, shredded rubber, being loose, will tend to be tossed and moved around, especially in high traffic area, so occasional to constant raking is involved based on how busy your playground is. We also recommend sanitizing the shredded rubber frequently.
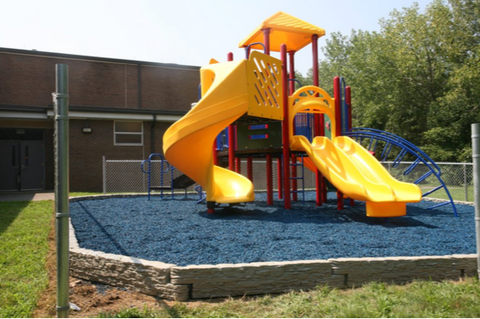
Moving on to the unitary surfacing world, we start with playground rubber tiles. Preformed and pre-pressed rubber granules or buffings or combinations of both to form blocks that are either glued to each other or interlock with each other with some type of mechanism or another. Rubber tiles, if installed correctly, are very low maintenance, can be installed indoors, are easily swappable in case of damage or vandalism, and are great for ADA with the right edges. Finally, they are a great way to keep tires out of our landfills. My issue with rubber tiles is that they tend to buckle when they are installed on compacted aggregate, so my preference is to install them on flat asphalt or concrete. Havin said that, I have seen a new generation of interlocking tiles that connect to each other that the buckling is minimized.
Before purchasing your rubber tiles you should ask for:
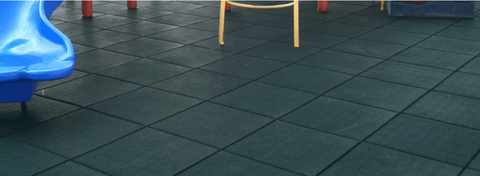
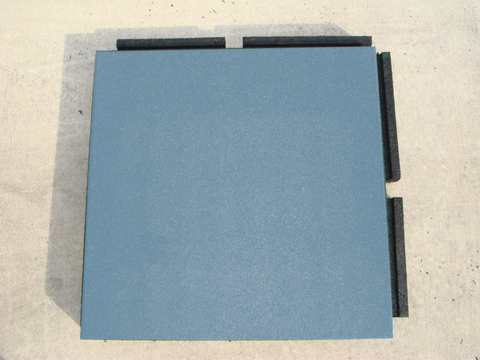
We have seen a steady increase in rubber tile cost over the last ten years as design and quality has improved. Tiles will cost anywhere between $35 to $60 per tile depending on the material it is made of and the thickness, which translates into its impact attenuation properties.
Rubber tiles are easily maintained. Blow leaves and debris on a regular basis, and make sure nothing gets lodged in between tiles. We also recommend sanitizing the tiles frequently. If a tile is damaged, you can easily replace it.
Synthetic turf surfacing is great unitary safety surfacing option for your playground. It comes in many varieties and has come a long way since it was first introduced in the sixties. The early generation of turf was made sing polypropylene and then nylon. We now have polyethylene, which is a lot softer and less abrasive, making it perfect for toddlers. Turf differs in the face height and weight. The height of the yarn and lushness gives it a different look and feel. The yarn is typically held together with a backing through which the yarn is stitched. Most synthetic turf needs infill. This can be rubber granules (Typically used in turf fields), rubber granules mixed with sand, or just sand, which is my preference when dealing with playground synthetic turf.
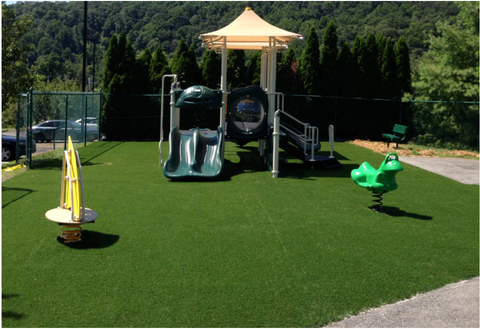
Synthetic turf usually comes in 15’ wide rolls. Although large quantities of turf can be ordered in narrower lengths, most orders will be 15’ wide. This means that you will have to do some careful measurements of your site. All the yarn in the turf rolls has to be facing the same direction, so you need to decide which direction to install your rolls will minimize waste. Another factor in deciding whether to go with synthetic turf or another surface is whether you have existing equipment with lots of footings. Having a large composite set with 40 footings in your site, will make synthetic turf install a nightmare. On the other hand, if you are installing the equipment from scratch, the turf can be installed first, and then footings for the equipment can be cut out in the turf itself and seamed around the post. This is a lot easier than maneuvering the turf rolls around the existing equipment.
The impact attenuation aspect of synthetic turf in a playground setting is achieved though the padding installed below the turf. Pads generally come in 4’x6’ panels, 1” and 2” thickness depending on the critical fall height needed.
There has been some controversy about synthetic turf around 10 years ago. Most of it had to do with the rubber infill used in sports field. I have read a tremendous amount of literature on this. The University of Connecticut has studied turf field at length and all their findings do not support any health hazard. I don’t like to use rubber infill for other reasons. It tends to make the surface hotter, and I don’t like little kids picking it up and ingesting it. The other controversy stems from bad players in the industry selling turf with high levels of lead. Most of that turf came from China. I believe the majority of synthetic turf companies in the U.S. sell a good, healthy product. However, you need to make sure you are asking for the right documentation and test results before you introduce turf, or any other type of surfacing to your playground.
When shopping for the right synthetic turf, here is what you should be looking for:
Synthetic turf can be installed on concrete, asphalt or compacted aggregate. As usual, choose the site carefully for drainage, shade and traffic. If you are installing aggregate, make sure you are removing all the organic material before you install the crushed stone. The stone has to be compacted to at least 95% and has surface that looks almost like asphalt. A soft spot can cause problems later with the turf caving in. Install all the drainage necessary before the turf goes on. After the site is ready, the padding is installed next. Padding should be contained either by borders or landscape timbers. The turf is then laid out and cut to fit the space. If there is existing playground equipment some cutting and seaming will be necessary. We recommend using only the best seam glue as seams are the weakest link in the entire system. After the turf is installed, sand infill is brushed in using power brooms, infill machinery, or push brooms.
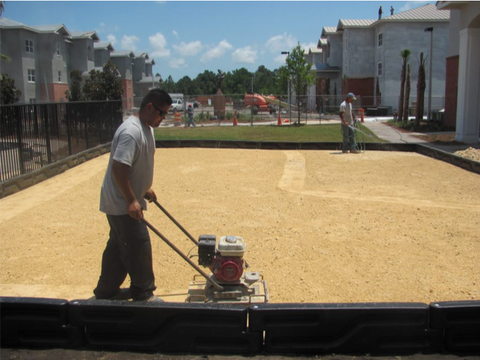
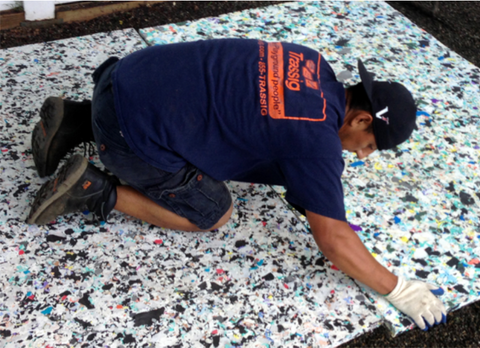
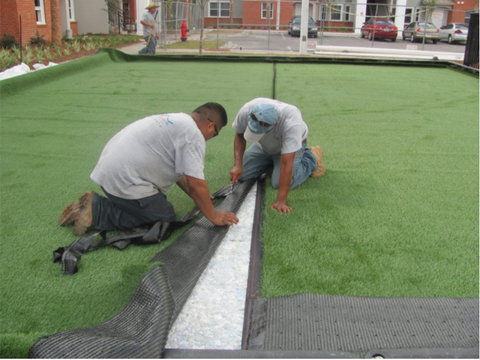
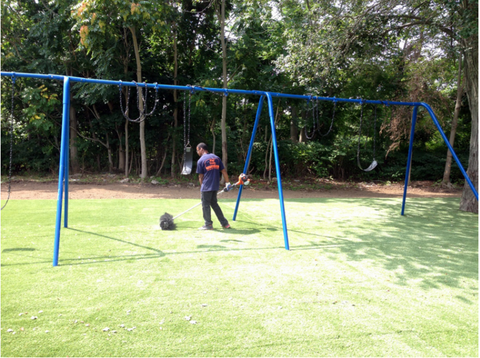
Turf varies widely based on the lushness of the yarn and the face height. A good quality turf will cost $12 to $14 a square foot installed. Padding will cost $2.50 to $3.50 a square foot installed. Resist the temptation to install much cheaper lawn turf on your playground. It won’t last long.
Popular since the late eighties, poured in place rubber is a unitary surface that is very well suited for ADA accessibility and as a surfacing solution around equipment that is already installed since it is a troweled product, whereby installers can easily work around existing posts and structures. The system is made up of two layers: A base layer comprised of tire buffings: these are created with tires are retreaded. The tire has to be buffed before the new tread is melted on top. The shavings that are created in this process are recycled and sold to the playground industry as buffings. The top layer, otherwise known as base layer is typically made up of EPDM rubber, although recently TPV and other polymers have been introduced to make this layer. Both layers are mixed with a binder and troweled on the spot and left to cure to make one continuous surface. Usually the curing takes 24 to 48 hours depending on ambient humidity and temperature. The binders used fall in two categories: Aromatic binders: These are amber in color and will typically darken even more over time. Aliphatic binders: These are clear and generally more UV resistant. They are favored when mixing light granules and splash pads, where contact with chlorine is expected. Whatever binder you use, please note that it is the most important factor in a successful poured in installation.
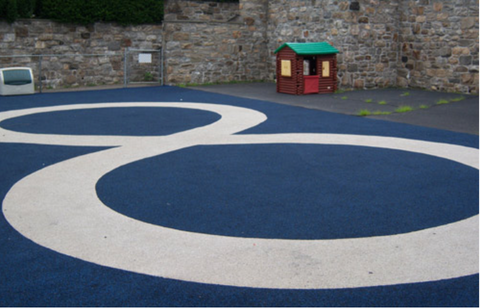
The thickness of the base layer is what determines the impact attenuation of the system. For example, a 4’ fall height is typically achieved with an inch and a half base layer. Please note this number will greatly vary based on the following factors:
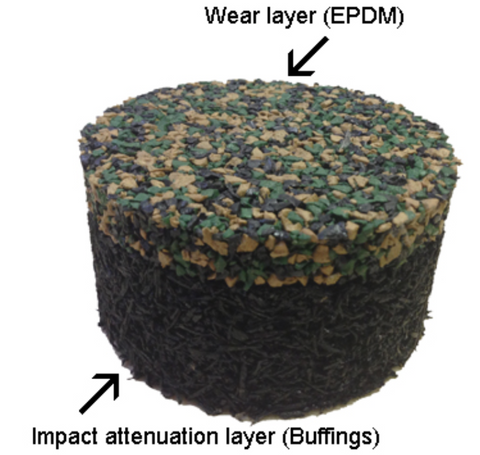
Poured in place rubber is one of the most expensive surfacing solutions out there, costing anywhere from $14 a square foot all the way to $30 per square foot or more depending on the thickness of the system, the binders used, and the type and color of rubber granules in the wear layer. Mixing the color with black granules in the wear layer is a good way to control the cost.
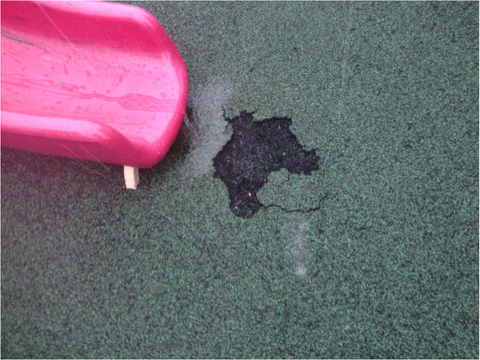
Bonded rubber is another version of poured in place rubber. But instead of two layers, one layer of colored slivers of SBR rubbers are used. So there is no wear layer. The color combinations of bonded rubber make it ideal for park paths since they have that leaf composition and appeal. The same rules of installing and maintaining poured in place rubber apply to bonded rubber. In terms of pricing, bonded rubber can be slightly cheaper from an install point of view since the install crew doesn’t have to make two trips waiting for the base layer to cure in the case of poured in place rubber.
The following quick video shows a bonded rubber installation
Other types of surfacing systems have appeared lately. We have seen some hybrid systems utilizing bags of shredded rubber as base and an outdoor carpet type system on top. We have seen shavings from shoe manufacturing used as surfacing. Whatever system you find, make sure you do your research about it and most importantly request the right ASTM test results. If you find a system I haven’t covered here, please send me an email at hal@trassig.com and I will be happy to discuss it with you.
